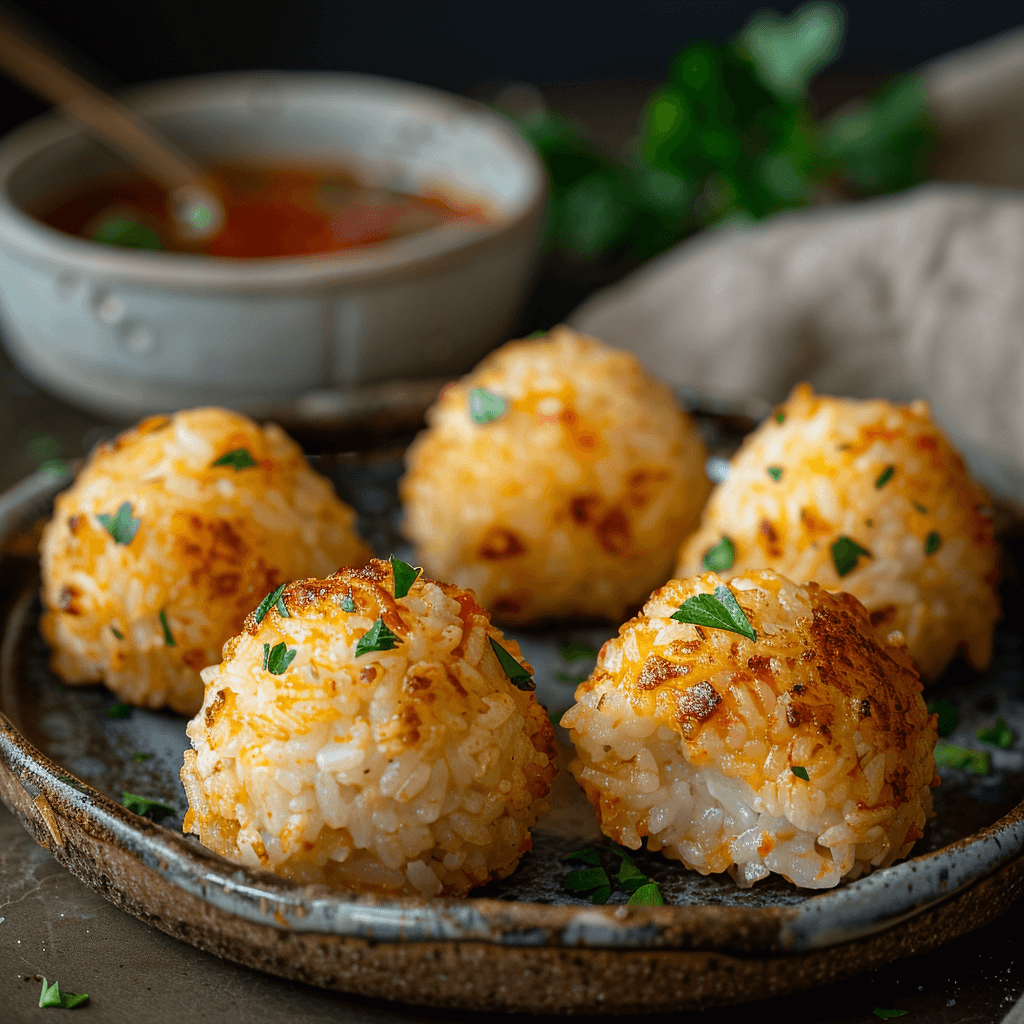
This Cheesy Rice Balls dish is a straightforward and satisfying comfort food appetizer that brings together tender, well-cooked rice and melted cheese, all encased in a perfectly crispy coating. Expect a delightful balance of textures and flavors in every bite.
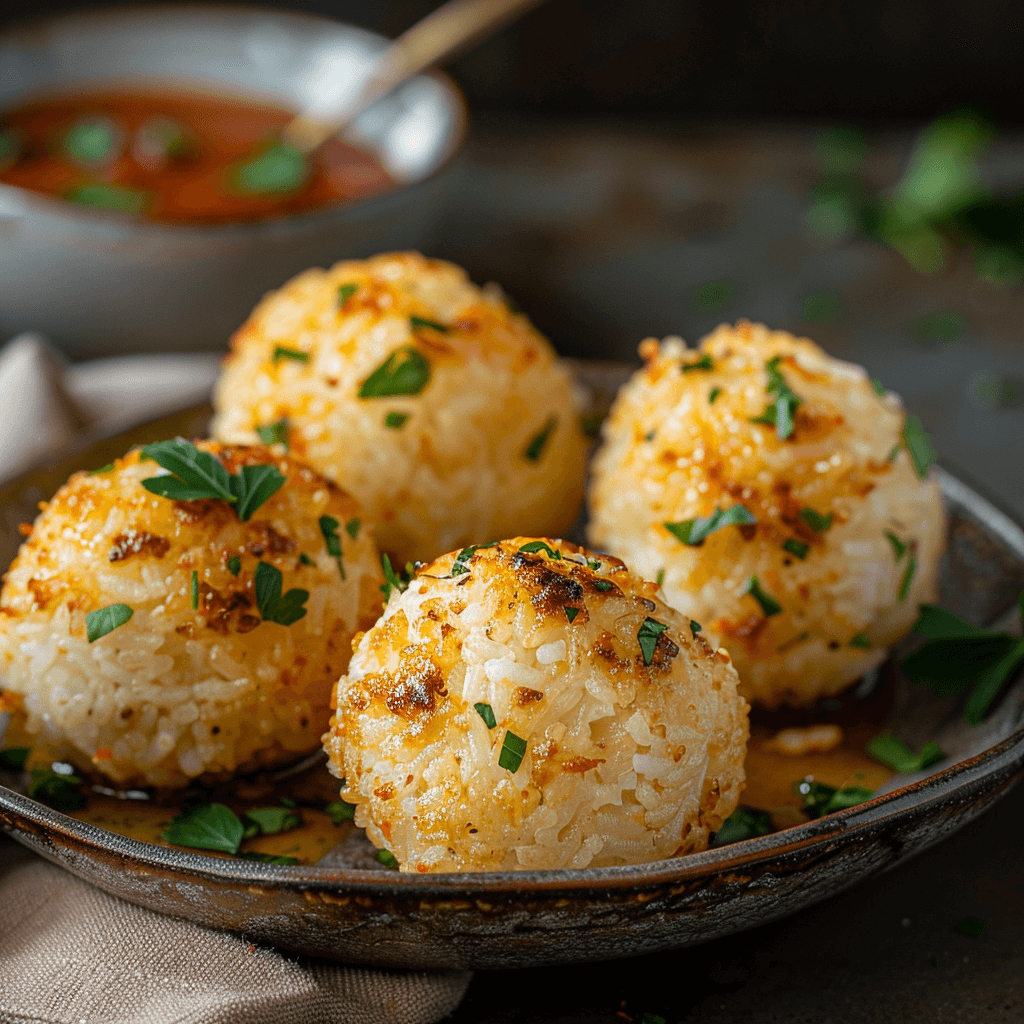
Table of contents
Recipe Background and Cultural Insights
The Tradition of Rice-Based Snacks
Rice has long been a staple in many cultures, and rice-based snacks offer a versatile base for countless recipes. This rice ball recipe celebrates the simplicity of rice while elevating it with the addition of cheese, a combination that resonates with global culinary traditions.
Fusion of Rice and Cheese in Global Cuisine
The idea of mixing rice with cheese is not new. Across various cultures, pairing a starchy base with melted cheese creates a rich, indulgent experience. Cheesy Rice Balls embody this fusion, merging the comfort of a cheese rice snack with traditional rice preparations.
Why Cheesy Rice Balls Are Special
Balanced Texture: Creamy Inside, Crispy Outside
Cheesy Rice Balls stand out because they offer a unique texture contrast. The interior is soft and creamy, thanks to the well-cooked rice and generous cheese, while the exterior is golden and crispy. This balance is key to creating truly memorable crispy rice balls.
Versatile Cooking Methods: Frying and Baking Options
Whether you prefer deep-fried rice balls for an extra crunch or opt for baking as a healthier alternative, this dish adapts to your needs. Both methods yield delicious Cheesy Rice Balls, making it a flexible option for any occasion.
Ingredients Overview

Choosing the Right Rice: Short-Grain and Sushi Rice
For an optimal Cheesy Rice Balls experience, using short-grain or sushi rice is recommended. These varieties provide the sticky texture needed to hold the cheese inside, making them essential for any authentic rice ball recipe.
Selecting Your Cheese: Mozzarella, Cheddar, Gouda
A mix of cheeses such as mozzarella, cheddar, or gouda not only enhances the flavor but also contributes to the gooey texture. Experimenting with different cheese combinations can transform your cheese rice snack into a personalized delight. For inspiration on mixing cheeses, check out our Mac and Cheese: How to Make Creamy, Cheesy from Scratch.
Essential Seasonings and Binding Agents
A few simple seasonings and a binding agent help to elevate the flavor profile of Cheesy Rice Balls. Common additions include salt, pepper, and a touch of herbs that complement both the rice and the cheese.
Step-by-Step Preparation

Preparing the Rice Base
Start by cooking your chosen rice until it’s soft yet sticky enough to form into balls. Allow the rice to cool slightly before moving on to the next step.
Incorporating Cheese and Seasonings
Mix in your selected cheeses along with the seasonings. The warmth of the rice helps the cheese begin to melt, creating pockets of creamy flavor throughout each rice ball.
Shaping the Rice Balls
Gently form the mixture into evenly sized balls.
Tips for Uniform Size and Texture
- Use your hands to shape the rice into compact balls.
- Ensure each ball is of similar size for even cooking.
- A light dusting of flour can help maintain their shape.
Cooking Methods
Frying: Achieving a Crispy Exterior
Deep-frying is a popular method to transform these into irresistibly crispy rice balls. The hot oil quickly seals the exterior, locking in moisture and flavor.
Baking: A Healthier Alternative
Alternatively, baking the Cheesy Rice Balls offers a less oily version that still delivers a satisfying crunch. Both methods highlight the inherent qualities of this comfort food appetizer.
Serving Suggestions and Storage Advice
Presentation Ideas and Suitable Dipping Sauces
Serve your Cheesy Rice Balls as a snack or an appetizer alongside dipping sauces such as marinara, a tangy mustard sauce, or a light garlic aioli. A simple garnish of fresh herbs enhances both presentation and flavor.
Best Practices for Storing Leftovers
Store any leftovers in an airtight container in the refrigerator. To reheat while preserving crispiness, consider using an oven or air fryer instead of a microwave.
Frequently Asked Questions (FAQs)
Can I use alternative rice varieties?
Yes, while short-grain or sushi rice is ideal, you can experiment with other types. However, the stickier texture is what makes a great rice ball recipe.
What cheese combinations work best?
Mozzarella, cheddar, and gouda are popular choices. Mixing different cheeses can create a unique flavor profile, similar to how our Cheesy Beef Burrito combines textures and tastes.
How can I maintain crispiness when reheating?
Reheating in an oven or air fryer helps retain the crispy exterior. Avoid microwaving if you wish to preserve the crunch.
Related Recipes and Variations
Other Comfort Food Appetizers
Cheesy Rice Balls are just one example of a comforting snack. Consider exploring other recipes that focus on simple, hearty ingredients.
Variations with Different Cheeses
Experiment with various cheeses to create new versions of this dish. Each cheese can bring a distinct flavor, making every batch a unique comfort food appetizer.
Gluten-Free and Vegan Adaptations
Consider gluten-free binders or vegan cheese options. For a twist on spicy flavors, try our How to Make the Perfect Spicy Rice Recipe for inspiration.
For a sweet change of pace, you might also enjoy our Banana Fritters: Simple, Crispy, and Delicious, which offer a completely different take on a crispy snack.

Cheesy Rice Balls
Ingredients
- 2 cups cooked short-grain or sushi rice
- 1 to 1½ cups shredded cheese mozzarella, cheddar, or gouda or a mix
- 1/4 cup finely chopped herbs optional; e.g., parsley or chives
- Salt and pepper to taste
- 1 egg as a binding agent
- 1/2 cup all-purpose flour for coating
- 1 cup breadcrumbs optional for extra crunch
- Oil for deep frying or a light spray of oil for baking
Instructions
Prepare the Rice Base:
- Cook rice according to package directions until soft and sticky. Let it cool slightly.
Mix in Cheese and Seasonings:
- In a large bowl, combine the warm rice, shredded cheese, chopped herbs, salt, pepper, and the egg. Mix until evenly distributed.
Form the Rice Balls:
- With lightly oiled hands, shape the mixture into balls of uniform size. For a firmer exterior, lightly roll each ball in flour, then dip in beaten egg, and finally coat with breadcrumbs.
Cooking Options:
- For Frying: Heat oil in a deep pan to 350°F (175°C). Fry the rice balls in batches until golden brown and crispy. Remove with a slotted spoon and drain on paper towels.
- For Baking: Preheat the oven to 400°F (200°C). Place the rice balls on a baking sheet lined with parchment paper. Lightly spray with oil and bake for 20–25 minutes, turning halfway, until the exterior is crispy.
Serving:
- Serve hot with your choice of dipping sauce. Enjoy as a snack or as part of a larger meal.
Notes
- Rice Temperature: Allow the rice to cool slightly after cooking. Using warm, but not hot, rice helps the mixture bind together properly.
- Cheese Selection: Combining different cheeses can enhance both texture and flavor. Mozzarella offers a gooey melt, while cheddar adds a bit of sharpness.
- Hand Technique: Lightly wet your hands when forming the balls to prevent the mixture from sticking and to help create uniform shapes.
- Coating Tips: For an extra crispy exterior, consider a double coating method—first dust in flour, then dip in beaten egg, and finally coat with breadcrumbs.
- Cooking Methods: Maintain oil temperature when frying to ensure the rice balls cook evenly without absorbing too much oil. If baking, flip them halfway through to achieve uniform crispiness.
- Storage and Reheating: Store any leftovers in an airtight container in the refrigerator. Reheat in an oven or air fryer rather than a microwave to preserve the crispy texture.
- Customization: Feel free to experiment with additional ingredients like finely chopped vegetables or a pinch of extra herbs to adjust the flavor profile to your taste.