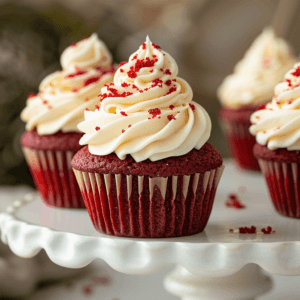
Imagine biting into a cupcake that’s soft, a little tangy, and has a beautiful red color. That’s a Red Velvet Cupcake! And when you top it with creamy, sweet cream cheese frosting? It’s like a party in your mouth! These cupcakes are not just pretty to look at; they taste amazing too. Let’s learn how to bake these yummy treats.
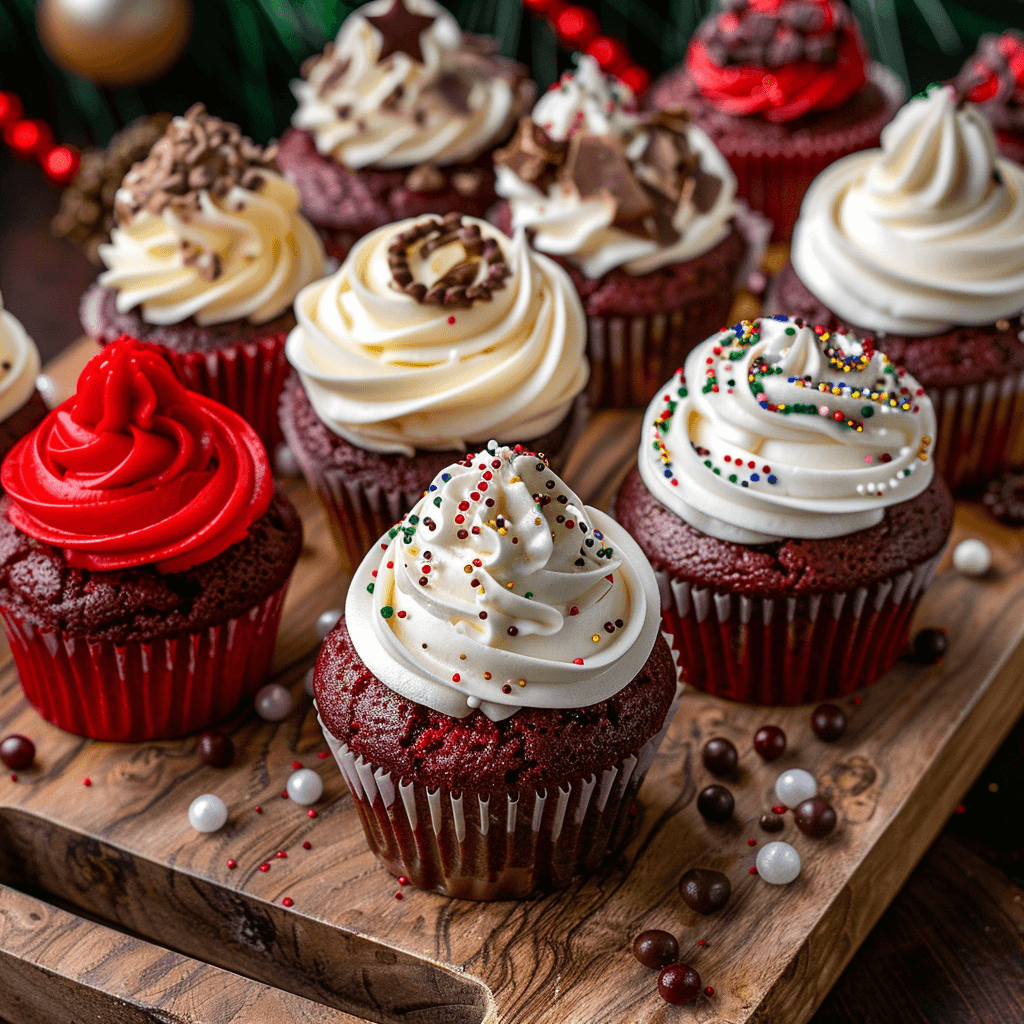
Table of contents
Why Red Velvet Cupcakes Are Irresistible
A Bite of History: The Story Behind Red Velvet
Have you ever wondered why they are called “Red Velvet”? It’s a fun story! Long ago, the red color came from cocoa powder reacting with buttermilk and vinegar. Nowadays, we often use food coloring to make them extra bright and red. But the classic taste? That’s still there. These cupcakes have been loved for generations!
What Makes These Cupcakes Special?
These aren’t just ordinary cupcakes. They have a special something.
Perfectly Balanced Flavor and Texture
It’s not just sweet; there’s a tiny hint of cocoa and a bit of tanginess that makes you want to take another bite. And the texture? Oh, it’s so soft and velvety, just like the name says!
The Magic of Buttermilk and Cocoa
Buttermilk is like a secret ingredient. It makes the cupcakes moist and gives them that special tangy taste. And just a little bit of cocoa powder adds a very mild chocolatey flavor, which is part of what makes red velvet, red velvet!
Topped with Tangy Cream Cheese Frosting
And the best part? The cream cheese frosting! It’s sweet and tangy, and it goes perfectly with the red velvet cupcake. It’s like they were made for each other!
Gather Your Ingredients for Red Velvet Cupcake Perfection
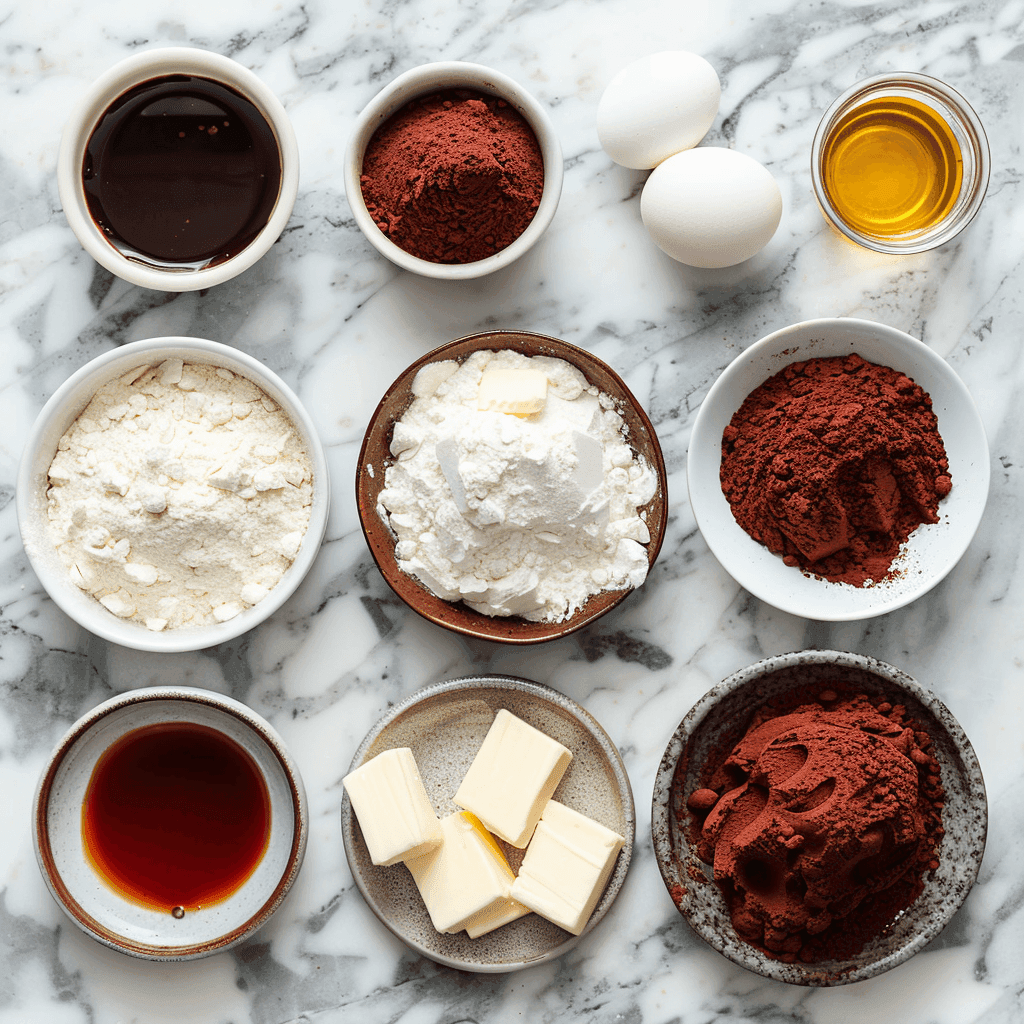
Let’s get everything ready to make these delicious cupcakes. It might seem like a lot, but each ingredient has a job to do.
For the Velvety Cupcakes
Here’s what you need to make the cupcakes themselves:
Flour Power: The Right Type Matters
You’ll need flour, the kind most people have at home, called all-purpose flour. Some recipes use cake flour but all-purpose works great too. It gives the cupcakes structure.
Sweetness Factor: Sugar and its Role
Sugar makes them sweet, of course! It also helps keep them soft and moist.
Buttermilk Secret: For Moisture and Tang
Buttermilk is what makes these cupcakes extra special. Don’t skip it if you can! It adds moisture and a little tang. If you don’t have buttermilk, don’t worry, there’s a simple trick you can use (we’ll talk about that later!).
Cocoa Touch: Just a Hint of Chocolate
Just a little bit of cocoa powder goes in. It’s not for a strong chocolate flavor, just a hint, to make it red velvet.
The Red Hue: Achieving the Classic Color
Food coloring is what makes them that bright red color we all know and love. You can use liquid or gel food coloring.
Other Key Players: Eggs, Oil, and Vanilla Extract
Eggs help hold everything together. Oil keeps them moist. And vanilla extract? It just makes everything taste a little bit better!
For the Dreamy Cream Cheese Frosting
Now for the frosting, the crown on top of our cupcakes!
Cream Cheese Foundation: The Star of the Frosting
The main ingredient is cream cheese. Make sure it’s softened so it mixes smoothly. It gives the frosting its tangy and rich taste.
Butter: For Richness and Smoothness
Butter makes the frosting creamy and smooth. Like the cream cheese, it should be softened before you start.
Sweetness Dust: Confectioners’ Sugar
This is a very fine sugar, also called powdered sugar. It makes the frosting sweet and gives it the right texture. We call it confectioners sugar.
Vanilla’s Whisper: Enhancing the Flavor
Just like in the cupcakes, a little vanilla extract makes the frosting taste even better!
Step-by-Step to Baking Delight: Making Red Velvet Cupcakes
Okay, let’s bake! It’s easier than you might think.
Getting Started: Prep Work for Success
First, get all your ingredients out. Make sure the cream cheese and butter are soft. Turn on your oven to 350°F (175°C) so it gets nice and hot. Put cupcake liners in your cupcake pan.
Mixing the Batter: The Art of Combining Ingredients
In one bowl, mix together the flour, cocoa powder, baking soda, and salt. In another big bowl, mix the sugar and oil. Then add the eggs and vanilla. Now, mix in the buttermilk and red food coloring. Finally, slowly mix the dry ingredients into the wet ingredients. Don’t mix too much! Just until it’s all combined.
Filling the Liners: Just the Right Amount
Fill each cupcake liner about 2/3 full. If you fill them too much, they might overflow!
Baking to Perfection: Watch the Oven Magic
Put the cupcake pan in the oven and bake for about 20-25 minutes. You’ll know they are ready when you gently poke one with a toothpick, and it comes out clean.
Cooling is Key: Before Frosting
Take the cupcakes out of the oven and let them cool in the pan for a few minutes. Then, move them to a wire rack to cool completely. They need to be totally cool before you frost them, or the frosting will melt!
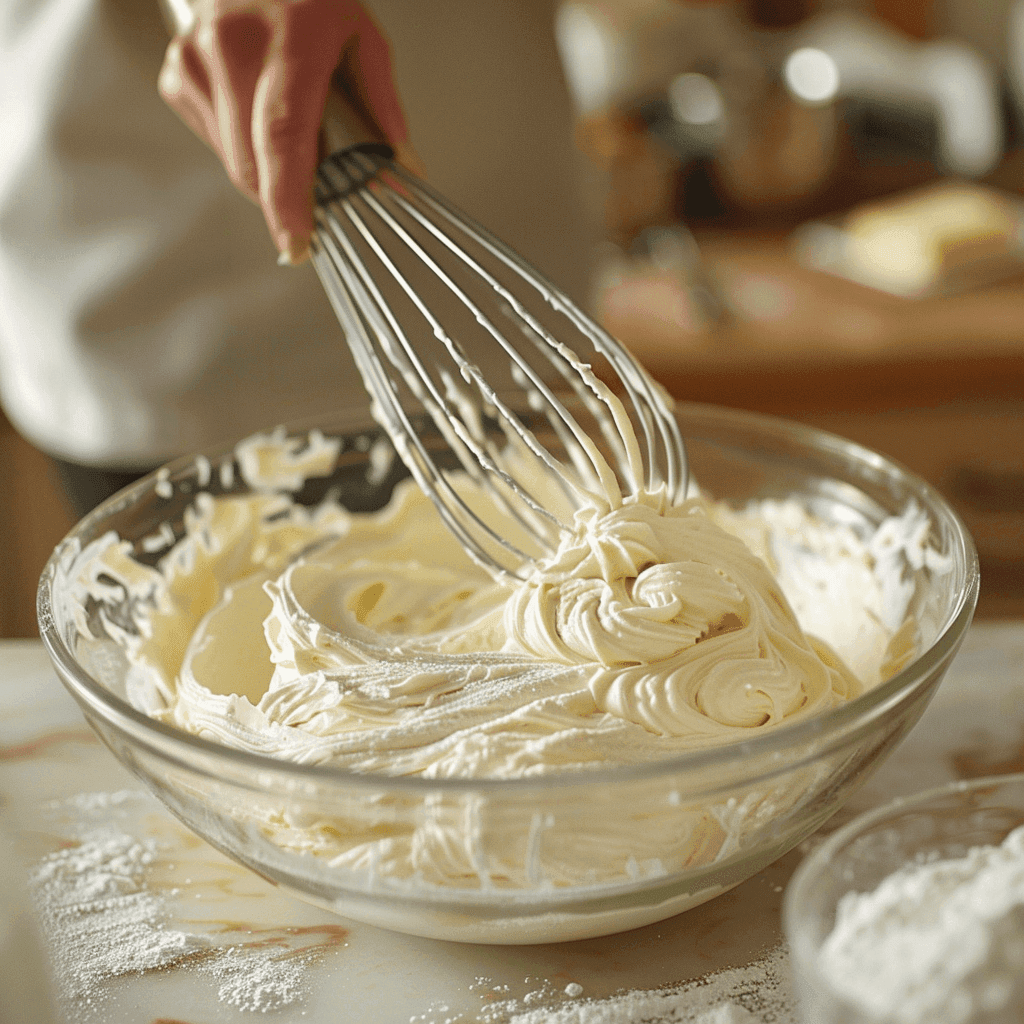
Whipping Up Frosting: Creamy Dreaminess
While the cupcakes are cooling, make the frosting. Beat the softened cream cheese and butter together until smooth and creamy. Slowly add the confectioners sugar and vanilla, and keep beating until it’s light and fluffy.
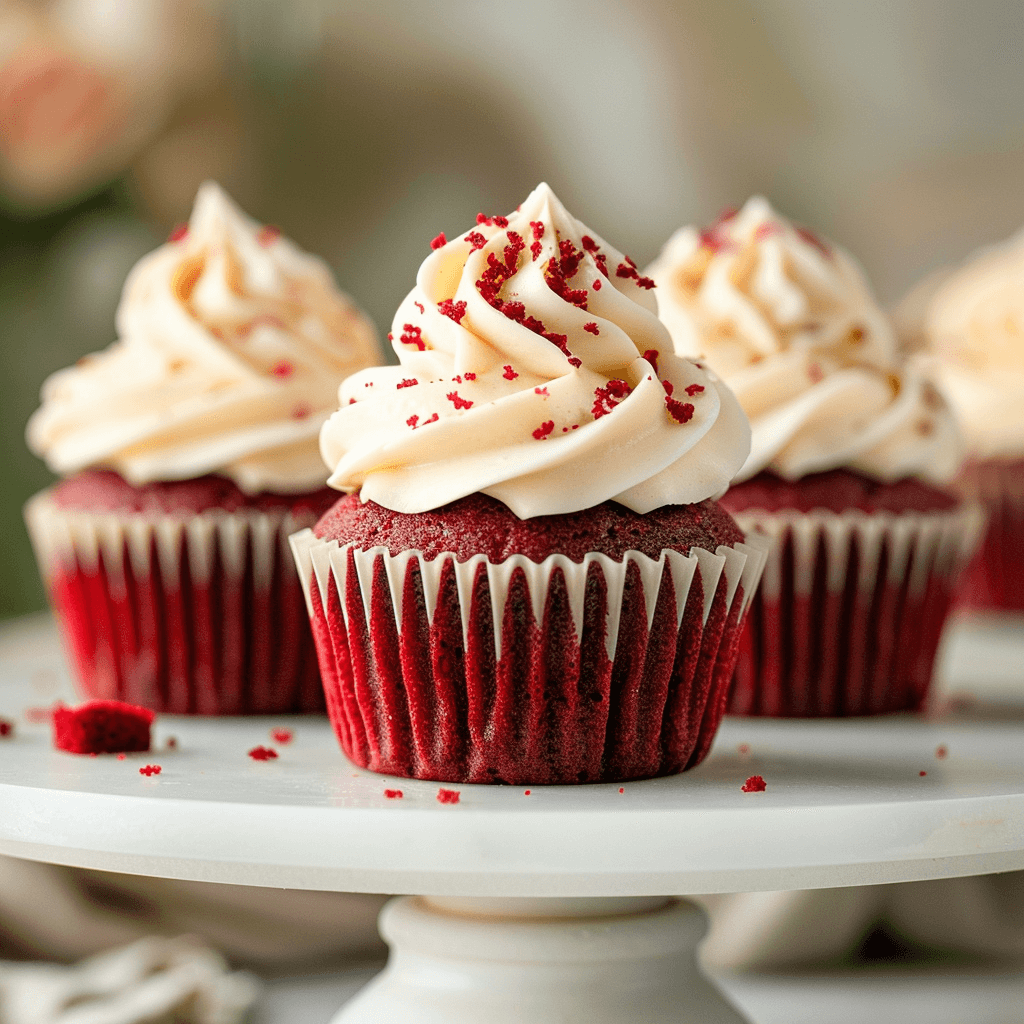
Frosting Finish: Decorate and Enjoy
Once the cupcakes are completely cool, it’s frosting time! You can use a knife or a piping bag to put frosting on top. Get creative and decorate them if you like!
Expert Tips for Baking the Best Red Velvet Cupcakes
From my kitchen tests, I discovered a few things that can really make your Red Velvet Cupcakes even better.
Measuring Matters: Accuracy in Baking
Baking is a bit like science. Measuring ingredients correctly is important. Use measuring cups and spoons and level them off.
Batter Basics: Don’t Overmix
When you mix the wet and dry ingredients, mix just until they are combined. Overmixing can make the cupcakes tough.
Cooling Cue: Patience Pays Off
Make sure the cupcakes are completely cool before you frost them. I know it’s hard to wait, but trust me, it’s worth it!
Frosting Finesse: Achieving the Perfect Texture
For the best cream cheese frosting, make sure your cream cheese and butter are softened, but not too soft or melted. If it gets too soft, the frosting might be too runny.
Customize Your Cupcakes: Fun Variations to Try
Want to try something a little different? Here are some ideas:
Vegan Red Velvet Cupcakes: Plant-Based Indulgence
Yes, you can make Red Velvet Cupcakes without any animal products! You can use plant-based butter, milk, and “buttermilk” (made with plant-based milk and lemon juice or vinegar). They will still be delicious and velvety.
Gluten-Free Delight: For Dietary Needs
If you can’t eat gluten, no problem! Just use a gluten-free flour blend instead of regular flour. You’ll still get that yummy Red Velvet Cupcakes taste.
Red Velvet Cake: Scaling Up for a Crowd
If you want a big cake instead of cupcakes, you can use the same batter to make a Red Velvet Cake! Just bake it in cake pans instead of cupcake pans, and bake it longer.
Serving and Savoring Red Velvet Cupcakes
Red Velvet Cupcakes are perfect for so many times!
Perfect Pairings: Drinks that Complement
They are great with a glass of cold milk, coffee, or even tea. For a grown-up party, maybe even a light-bodied red wine.
Creative Decorations: Make them Extra Special
You can keep it simple with just frosting, or you can add sprinkles, chocolate shavings, or even fresh strawberries. For a really elegant look, try decorating them like these chocolate covered strawberries.
Occasions to Celebrate with Red Velvet
Birthdays, holidays, parties, or just because you want a treat! Red Velvet Cupcakes are always a good idea. They’d be especially fun for birthday cookies themed parties too!
Keeping Your Cupcakes Fresh: Storage Secrets
Want to make them ahead of time? Here’s how to keep them fresh:
Storing at Room Temperature: Short-Term Freshness
Frosted Red Velvet Cupcakes can stay at room temperature for a day or two in an airtight container.
Refrigeration Route: Extending Shelf Life
For longer storage, keep them in the fridge in an airtight container. They’ll last for about a week. Just remember the frosting might get a bit firmer in the fridge.
Freezing for Later: Make Ahead Magic
Yes, you can freeze Red Velvet Cupcakes! Freeze them without frosting first. Once frozen, wrap them well in plastic wrap and then in a freezer bag. When you are ready to eat them, let them thaw at room temperature and then frost them. This is a great make-ahead tip!
Frequently Asked Questions About Red Velvet Cupcakes
Flour Files: All-Purpose vs. Cake Flour
All-purpose flour works perfectly for Red Velvet Cupcakes. Cake flour can make them even softer, but it’s not necessary. All-purpose is just fine for this recipe.
Red Color Concerns: How to Get it Right
If you want a really bright red color, use gel food coloring. Liquid food coloring works too, you might just need to use a bit more. The amount of cocoa powder can also affect the redness.
Frosting Ahead: Time-Saving Tips
Yes, you can make cream cheese frosting ahead of time! Store it in the fridge in an airtight container. When you’re ready to use it, let it soften a bit at room temperature and then whip it again to make it fluffy.
Buttermilk Blues: Substitutions and Solutions
No buttermilk? No problem! You can make a substitute by adding a tablespoon of lemon juice or vinegar to a cup of regular milk. Let it sit for 5 minutes, and it will become like buttermilk. This is a handy trick my grandmother taught me!
More Delicious Dessert Recipes to Explore
If you love cupcakes and want to try other yummy treats, check these out:
Try these Related Recipes if you love cupcakes
Maybe you’d like to try a banana brownie recipe next, or perhaps some strawberry shortcakes for a fruity dessert? Or if you’re in a fall mood, Pumpkin Flan for Fall is a must-try!
Red Velvet Cupcakes with Cream Cheese Frosting
Ingredients
For the Red Velvet Cupcakes:
- 1 1/2 cups all-purpose flour
- 1 1/4 cups granulated sugar
- 1 tsp baking soda
- 1 tbsp cocoa powder
- 1/2 tsp salt
- 1 cup buttermilk
- 1/2 cup vegetable oil
- 2 large eggs
- 2 tsp vanilla extract
- 1 tbsp white vinegar
- 1 ounce red food coloring liquid or gel
For the Cream Cheese Frosting:
- 8 ounces cream cheese softened
- 1/2 cup 1 stick unsalted butter, softened
- 3 cups confectioners’ sugar
- 1 tsp vanilla extract
Instructions
Get Started:
- Preheat oven to 350°F (175°C). Line a 12-cupcake pan with cupcake liners.
Make the Cupcake Batter:
- In a medium bowl, whisk together flour, cocoa powder, baking soda, and salt.
- In a large bowl, beat sugar and oil with an electric mixer until combined.
- Beat in eggs one at a time, then stir in vanilla extract.
- In a separate small bowl, combine buttermilk, vinegar, and red food coloring.
- Gradually add the wet ingredients to the dry ingredients, mixing on low speed until just combined. Do not overmix.
Bake the Cupcakes:
- Fill each cupcake liner about 2/3 full with batter.
- Bake for 20-25 minutes, or until a toothpick inserted into the center comes out clean.
- Let cupcakes cool in the pan for a few minutes before transferring them to a wire rack to cool completely.
Prepare the Cream Cheese Frosting:
- In a large bowl, beat softened cream cheese and butter with an electric mixer until smooth and creamy.
- Gradually add confectioners’ sugar, beating on low speed until incorporated.
- Stir in vanilla extract and beat until frosting is light and fluffy.
Frost and Serve:
- Once cupcakes are completely cooled, frost them generously with cream cheese frosting.
- Decorate as desired and enjoy!