Table of contents
The Story Behind These Easy Bars
Peanut Butter Chocolate Bars have become a staple in kitchens everywhere. From my kitchen tests, these bars stand out for their simplicity and undeniably rich taste. They belong to the family of no-bake recipes that save time yet deliver an incredible result. Through recipe testing, people have discovered that combining peanut butter and chocolate into dense dessert bars is both convenient and crowd-pleasing.
I discovered that the key to these Peanut Butter Chocolate Bars is balancing the smooth sweetness of melted chocolate with the salty creaminess of peanut butter. This approach yields a perfect bite every time. The bars also fit comfortably among other easy desserts because they require minimal effort—ideal for those moments when you want something decadent without turning on the oven.
Peanut Butter and Chocolate Combination
Peanut butter and chocolate share a timeless bond that appeals to anyone looking for a sweet-salty treat. This duo shows up in everything from candy cups to cakes, but in these dessert bars, they truly shine without any complicated methods. By blending the flavors together, you get a dessert that effortlessly highlights each ingredient’s strengths.
Based on tradition, you can see why these two ingredients show up so frequently in easy desserts. They’re affordable, readily available, and pair well with a variety of textures and add-ins. Whether you enjoy the snap of a chocolate coating or the smoothness of peanut butter filling, the combination has proven irresistible time and again.
Popularity as a Family-Friendly Treat
Families often turn to Peanut Butter Chocolate Bars when introducing children to the kitchen. There’s minimal mess and zero oven time, reducing the stress of potential mishaps. The entire process is simple, involving just a few steps that kids can help with, such as mixing the peanut butter base or spreading melted semi-sweet chocolate chips on top.
My grandmother taught me that getting children involved in making food fosters their interest in cooking. These bars exemplify that idea with their straightforward assembly. No advanced techniques are required, making them a perfect lesson in the delights of homemade treats.
Why Peanut Butter Chocolate Bars Are Special
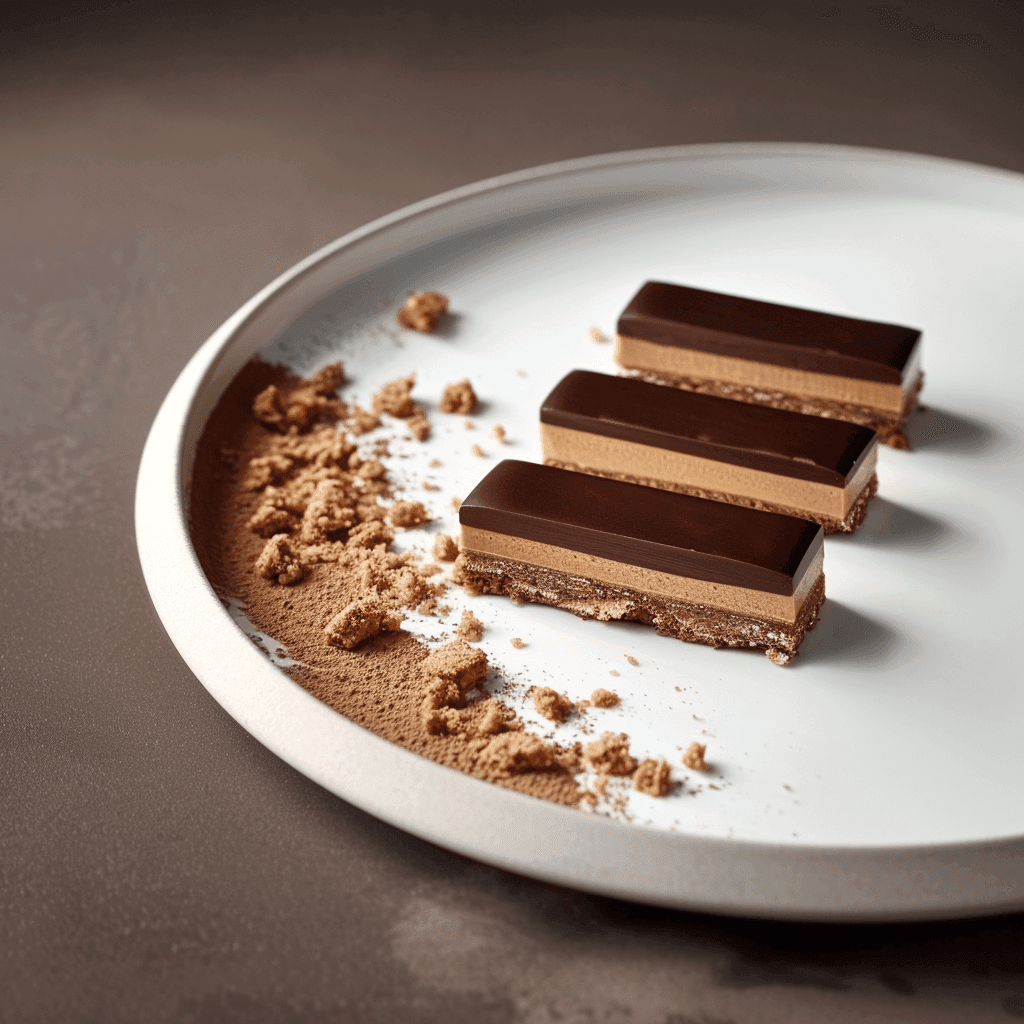
Peanut Butter Chocolate Bars deserve a spot in your culinary repertoire because they’re both decadent and practical. The texture is a perfect balance: a firm peanut butter base paired with a thick layer of chocolate that snaps ever so slightly. From family reunions to potlucks, these bars fit any occasion without demanding complex tools or lengthy preparation.
For best results, you only need a handful of common ingredients—truly living up to that “less is more” philosophy. This short ingredient list allows each flavor to shine, making these bars a stand-out among other no-bake recipes. If you appreciate desserts that come together quickly while tasting like you spent hours perfecting them, these are for you.
No-Bake Convenience
Avoiding the oven is a major bonus for anyone dealing with hot weather or limited kitchen appliances. Because of this, no-bake recipes like Peanut Butter Chocolate Bars thrive. All you need is a simple stovetop or microwave method to melt a few ingredients, and the refrigerator does the rest.
Culturally, no-bake options have always served as quick solutions for busy households. They’re especially handy for last-minute gatherings or holiday events when oven space is scarce. This recipe’s straightforward process truly embodies the convenience factor.
5-Ingredient Simplicity
One of the main attractions is the minimal ingredient list. Peanut butter, graham cracker crumbs, confectioners’ sugar, butter, and chocolate form the core of these Peanut Butter Chocolate Bars. This focus on just a few ingredients allows the flavors to blend seamlessly.
Here’s what works: a simple recipe fosters creativity. You can add extras like chopped Reese’s peanut butter cups without overwhelming the core taste. It’s a testament to how limiting your ingredients can ironically expand your possibilities.
Easy Desserts for Busy Days
Easy desserts are indispensable in a fast-paced lifestyle. Peanut Butter Chocolate Bars fit right in because they can be mixed, chilled, and sliced in a relatively short time. Even on hectic evenings, you can serve a tray of bars before heading out the door to a gathering.
From my kitchen tests, I’ve seen how quickly these bars disappear once served. They don’t require any fancy garnishing. In fact, their simplicity often serves as the biggest attraction, especially for those craving a swift, fuss-free sweet fix.
Key Ingredients You’ll Need
Every component in Peanut Butter Chocolate Bars has a specific role in achieving that irresistible taste and texture. The sweetness is balanced by the rich saltiness of peanut butter, while the chocolate layer provides a finishing snap. Choosing the best versions of these ingredients ensures a more satisfying final product.
Though the recipe is not lengthy, understanding each element helps maximize flavor. Some might prefer organic peanut butter or premium chocolate, but even standard pantry supplies work wonders. Below are a few details about each ingredient that might interest you.
Peanut Butter
Peanut butter brings smoothness and a nutty depth to these dessert bars. Whether you use creamy or crunchy is often a personal choice. From my kitchen tests, creamy peanut butter creates a velvety base that melds easily with other ingredients.
If you love some crunch, you can opt for chunky peanut butter or add chopped nuts. Just keep in mind that consistency matters, so adjusting the amount of graham cracker crumbs or confectioners’ sugar might be necessary. The entire recipe structure leans on this star ingredient to harmonize sweet and salty flavors.
Chocolate and Semi-Sweet Chips
The chocolate layer typically uses semi-sweet chocolate chips because they melt well and deliver a balanced cocoa taste. Some folks use milk chocolate for extra sweetness, while others prefer bittersweet for a darker, less sugary edge. Either way, the chocolate ties everything together.
If you want to push the indulgence factor, swirl in some peanut butter chips or add a handful of chopped Reese’s peanut butter cups. The layering process should still remain straightforward, ensuring that the final bars stay cohesive and easy to slice.
Graham Cracker Crumbs
Graham cracker crumbs give these Peanut Butter Chocolate Bars their solid base. They also contribute a subtle sweetness and a pleasing crumbly texture that pairs well with creamy peanut butter. Crumbs are easy to find in any grocery store, or you can crush them at home for a fresher taste.
In the realm of no-bake recipes, graham crackers are often a go-to choice for structural support. They bind nicely with melted butter and sugar, preventing the base from becoming too sticky. If you don’t have graham crackers, digestive biscuits or similar cookies can play the same role.
Confectioners’ Sugar
Confectioners’ sugar blends effortlessly into the peanut butter mixture. It adds sweetness while helping achieve a smooth consistency. Some may consider powdered sugar optional, but it’s essential for creating the right texture in these bars.
Through recipe testing, I discovered that sifting the sugar before mixing helps avoid lumps. This results in a more uniform filling. If you prefer less sweetness, you can slightly reduce the sugar, but remember that it does help maintain the bar’s structure.
Butter
Melted butter plays two roles in this recipe: adding richness and acting as a binding agent. When combined with peanut butter and graham cracker crumbs, it helps create a sturdy, sliceable base for your Peanut Butter Chocolate Bars. Real, unsalted butter typically yields the best results.
If you use salted butter, consider adjusting the recipe’s overall salt content to avoid overpowering the peanut butter flavor. Refrigerating the mixture after adding butter is key, since it solidifies and helps maintain the bar’s shape once chilled. This process keeps the base firm yet not overly dense.
How to Make Peanut Butter Chocolate Bars
Making Peanut Butter Chocolate Bars is a straightforward process that’s perfect for beginner and seasoned cooks alike. The general flow is to combine the peanut butter base, press it into a pan, top it with melted chocolate, then let everything chill. The result is a layered treat that’s ready to cut and serve.
Unlike baked goods, these bars rely on cooling rather than oven heat to set. This is why they’ve become such a favored addition to collections of easy desserts. Below is a breakdown of the method without giving away the exact steps until the recipe card at the end.
Equipment and Prep Steps
Before starting, gather essentials like a mixing bowl, microwave-safe bowl or saucepan, and a standard 8×8 or 9×9 baking dish. Having parchment paper on hand makes lifting the bars out for slicing more convenient. A sturdy rubber spatula also proves helpful for blending dense mixtures.
From my kitchen tests, measuring ingredients accurately is crucial to avoid overly soft or crumbly bars. Make sure you have a good set of measuring cups and spoons. Once everything is laid out, you’ll find the process flows quickly from mixing to layering.
Building the Peanut Butter Base
The base is formed by combining melted butter, peanut butter, graham cracker crumbs, and confectioners’ sugar. Each component works in harmony to produce the signature texture. Thorough mixing ensures the crumbs and sugar fully absorb into the butter-peanut butter blend.
A key tip is to press the mixture firmly and evenly into the pan. This eliminates gaps that might cause the bars to break apart later. After pressing, it’s best to let the pan rest in the fridge to firm up before adding the chocolate layer.
Layering the Chocolate Topping
To create the topping, melt your chosen chocolate, typically semi-sweet chocolate chips. Some prefer a double boiler on the stovetop, while others use quick microwave bursts. Either approach is fine as long as you stir frequently to prevent scorching.
Once melted, pour or spread the chocolate gently over the chilled peanut butter layer. Smooth it out with a spatula, making sure you get an even coverage. This topping completes the look and taste of the bars, contrasting perfectly with the softer base underneath.
Chilling and Cutting the Bars
The final step involves placing the layered mixture back into the fridge for at least an hour, or until the chocolate is firm. Chilling is crucial to achieve neat slices. If you rush this part, the chocolate may smear or the base might crumble.
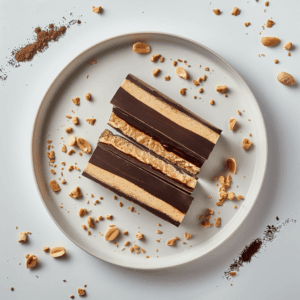
Once everything is set, lift the parchment paper from the pan and cut the bars into squares or rectangles. You’ll see the distinct peanut butter layer on the bottom and the shiny chocolate on top. It’s a satisfying moment that signals your Peanut Butter Chocolate Bars are ready to be enjoyed.
Tips for Perfect Peanut Butter Chocolate Bars
From my kitchen tests, the right balance of each ingredient yields the best possible Peanut Butter Chocolate Bars. Small tweaks, like adjusting sugar for sweetness or chocolate type for flavor depth, make a noticeable impact. These tips provide ways to personalize the recipe to your preference.
If you want the bars to be extra rich, swap some of the semi-sweet chocolate chips for darker varieties. Alternatively, if you enjoy a sweeter flavor, combine milk chocolate with the peanut butter layer. The final result depends on how you interpret these suggestions and craft the recipe your way.
Consistency Adjustments
Some folks prefer a crumbly bar, while others like a firmer base. You can alter consistency by adding a bit more graham cracker crumbs or reducing melted butter. Keep track of each change so you can replicate the exact texture you love in future batches.
For best results, test a small batch if you’re experimenting with major substitutions. If the mixture seems too sticky, add a touch more crumb. If it’s too dry, a small spoonful of peanut butter often solves the problem quickly.
Common Mistakes to Avoid
One common mistake is rushing the cooling process. The bars need enough time to set, or they won’t slice neatly. Another error is overheating the chocolate, causing it to seize or develop a grainy texture.
Also, if you forget to press the peanut butter mixture firmly, air pockets can cause crumbly pieces. Ensuring each layer is fully set before the next step helps you end up with a neat, picture-perfect tray of bars. A little patience often goes a long way.
Creative Flavor Twists
You can dress up Peanut Butter Chocolate Bars with an extra drizzle of caramel or an added splash of vanilla extract in the base. There’s also the option of swirling white chocolate into the top for an eye-catching pattern. These additions keep your bars visually interesting and uniquely yours.
Consider mixing chopped peanuts or crushed pretzels into the peanut butter layer for extra crunch. You can even fold in tiny pieces of Reese’s peanut butter cups to magnify that beloved flavor combination. Creativity transforms these classic bars into something spectacular every time.
Fun Variations and Substitutions
Personalizing your Peanut Butter Chocolate Bars is part of the fun. Some variations come from swapping the type of peanut butter, while others involve adding different toppings. These small tweaks can significantly alter the flavor and texture, making each batch a new experience.
Everything from the thickness of the chocolate layer to the brand of confectioners’ sugar can yield subtle differences in taste. Through recipe testing, I found that changing even one ingredient can update the entire vibe of these dessert bars. It’s an invitation to experiment while still following a reliable core process.
Crunchy vs. Creamy Peanut Butter
Creamy peanut butter creates a smooth base that sets firmly and evenly. Crunchy peanut butter, on the other hand, adds texture. If you opt for crunchy, be mindful of how the peanuts will affect slicing.
Sometimes, adding a second layer of peanut butter on top of the base before the chocolate can emphasize that signature flavor. To keep a balanced bar, adjust the sugar and crumb amounts accordingly. Experimentation here often leads to the best personalized version.
Mix-Ins Like Reese’s Peanut Butter Cups
Layering chopped Reese’s peanut butter cups between the peanut butter base and melted chocolate is a tried-and-true trick for an extra indulgent treat. This approach brings even more peanut butter flavor into the mix. The candy pieces become slightly melded with the chocolate topping during chilling.
You can also sprinkle them on top as a decorative finish. With or without added candy, the bars remain a testament to the magical blend of chocolate and peanut butter. However, these little extras can push the flavor profile into a whole new zone of deliciousness.
Gluten-Free or Vegan Options
For a gluten-free twist, choose certified gluten-free graham cracker crumbs. It’s a seamless swap that keeps the essence of these Peanut Butter Chocolate Bars intact. Ensure all your other ingredients, including chocolate, align with gluten-free standards.
If you need a vegan version, use plant-based butter alternatives and check that your semi-sweet chocolate chips contain no dairy products. There are many vegan peanut butter varieties on the market as well. Thanks to these easy modifications, the bars remain approachable for various dietary needs.
Storage and Freezing Instructions
Storing Peanut Butter Chocolate Bars is simple and adds to their appeal as easy desserts. You can keep them in an airtight container in the refrigerator for up to a week. The bars remain firm yet chewy, making them perfect for a midday snack or quick dessert.
An added bonus is that these bars taste delicious cold. Through recipe testing, I discovered that chilling them overnight enhances the flavors. The peanut butter layer becomes a bit denser, while the chocolate topping remains crisp.
Keeping Bars Fresh in the Fridge
Refrigeration not only preserves freshness but also maintains the distinct layers. If you live in a warm climate, it’s extra important to keep them cool so the chocolate doesn’t melt. Stacking them with parchment paper in between layers helps prevent sticking.
When ready to eat, you can either enjoy them straight from the fridge or let them sit at room temperature for a few minutes to soften slightly. This minor wait time can reveal a creamier mouthfeel in the peanut butter base. Either way, they’re ready whenever your sweet tooth strikes.
Freezing for Longer Shelf Life
If you’re planning to store the bars for longer than a week, freezing is a great option. Simply wrap them tightly in plastic wrap, then place in a freezer-safe container. They can stay fresh in the freezer for up to three months.
When you crave a treat, thaw the bars in the refrigerator or on the counter until they soften enough to slice easily. The flavor remains surprisingly robust, and the bars keep their shape well during thawing. This approach ensures you always have a quick dessert on hand for sudden cravings.
Frequently Asked Questions (FAQs)
Many readers want to get the most out of their Peanut Butter Chocolate Bars. Common queries revolve around texture, ingredient substitutions, and troubleshooting mishaps in no-bake recipes. These FAQs address some of the most frequent concerns.
If you’re looking for more insights on chocolate-based sweets, you may also explore other recipes that focus on no-bake methods. Addressing these questions up front ensures you have the tools to succeed, even if you run into small snags.
Best Way to Prevent Crumbling?
Crumbly bars usually indicate the base is too dry or was not pressed firmly into the pan. Adding a tad more melted butter or peanut butter can remedy this. Also, make sure the graham cracker crumbs are well-incorporated so everything sticks together better.
Even distribution of each ingredient also matters. Use a spatula or even the back of a spoon to apply a bit of pressure while spreading. This small step makes a big difference in the final structural integrity of the bars.
Can I Use Natural Peanut Butter?
You can, but be aware that the oil separation in some natural peanut butters may affect the consistency. It’s best to stir natural peanut butter thoroughly before measuring it out. If the texture is very runny, you may need extra graham cracker crumbs or slightly less butter.
As always, you might benefit from testing a half-batch first to see how well it sets. For best results, look for natural peanut butter that stays relatively stable and doesn’t separate excessively. This helps keep the bars firm and easy to slice.
How to Get a Smooth Chocolate Top?
Using melted semi-sweet chocolate chips generally produces a smooth, glossy finish if melted correctly. Stir the chocolate frequently as it warms. Avoid introducing water into the melting bowl, as even a tiny drop can make your chocolate seize.
Spreading the chocolate with a spatula or the back of a spoon in consistent strokes helps as well. If you see any bubbles or imperfections, gently tap the pan on the countertop to level out the surface. A little care during this step results in picture-perfect Peanut Butter Chocolate Bars.
Related No-Bake Dessert Bars
Peanut Butter Chocolate Bars are just one shining example in the world of simple, indulgent no-bake recipes. If you love chocolate treats, you might also appreciate exploring new flavor combinations and techniques. Cooking skills evolve with each recipe you try, so don’t hesitate to keep experimenting.
For those seeking more ways to enjoy sweet bars or quick treats, you can check out a range of dessert inspirations. Easy desserts often share key characteristics: minimal ingredients, straightforward methods, and universal appeal. Expanding your repertoire ensures you always have a go-to treat.
Other Chocolate Peanut Butter Treats
Sometimes a twist on these bars can be found in brownies, cookies, or layered puddings. If you crave more chocolate-based ideas, take a look at The Best Banana Brownie Recipe (Super Easy & Kid-Friendly!). You may find creative techniques that translate well to peanut butter desserts, too.
Adding peanut butter to classic recipes can produce new, mouthwatering flavors. Whether it’s swirling it into brownies or drizzling it over cookies, the combination rarely disappoints. Peanut Butter Chocolate Bars remain a shining example of how well these two ingredients unite in dessert form.
Quick and Simple Dessert Bars
If you’re looking for further bar-style treats, How to Make 4-Ingredient Butter Cookies (No Chill, 30-Minute Recipe!) might pique your interest. While cookies differ in form, the principle of simplicity applies similarly. Minimal ingredients mean you can whip them up at a moment’s notice.
Another favorite from many baking enthusiasts is Chocolate Banana Bread Recipe – Decadent & Easy. Though it’s not a bar, the mixture of banana and chocolate resonates with fans of sweet, quick bakes. Keeping an arsenal of diverse easy desserts means you’ll never run out of satisfying options.
Peanut Butter Chocolate Bars
Ingredients
- 1 cup peanut butter creamy or crunchy
- 1/2 cup butter melted
- 2 cups graham cracker crumbs
- 1 3/4 cups confectioners’ sugar approximately
- 1 1/2 cups semi-sweet chocolate chips melted
Optional:
- 1/2 cup chopped Reese’s peanut butter cups for an extra indulgent twist.
Instructions
- Mix the Base: In a medium bowl, combine the melted butter, peanut butter, graham cracker crumbs, and confectioners’ sugar. Stir until well blended and no dry spots remain.
- Press into Pan: Line an 8×8-inch or 9×9-inch pan with parchment paper. Press the peanut butter mixture evenly and firmly into the pan to form the base layer. Refrigerate for about 20 minutes.
- Melt the Chocolate: In a microwave-safe bowl or using a double boiler, melt the semi-sweet chocolate chips. Stir often to avoid scorching.
- Add Chocolate Layer: Remove the chilled base from the refrigerator. Pour or spread the melted chocolate evenly over the peanut butter layer. Smooth the surface with a spatula.
- Chill and Slice: Return the pan to the refrigerator and let the bars set for at least 1 hour, or until the chocolate is firm. Lift the bars out using the parchment paper and cut into squares or rectangles.
Notes
Why the Total Time is 1 Hour 10 Minutes
- Prep Time (10 minutes): This covers your active work—measuring, mixing, and assembling the ingredients in the pan.
- Chilling Time (60 minutes): After assembly, the bars need time in the fridge to firm up. This waiting period ensures the peanut butter layer and the chocolate topping set properly, making it easy to slice the bars.
Consistency Tips
- If the peanut butter layer feels too soft, add a bit more graham cracker crumb or reduce the melted butter.
- If the mixture crumbles, stir in another spoonful of peanut butter or butter to help bind everything together.
Chocolate Variations
- Use a mix of semi-sweet and milk chocolate for extra sweetness, or opt for bittersweet chocolate for a richer flavor.
- Consider topping with chopped Reese’s peanut butter cups, nuts, or a caramel drizzle to enhance both texture and taste.
Vegan & Gluten-Free Modifications
- Vegan Option: Replace dairy butter with a plant-based version and confirm the chocolate chips are dairy-free.
- Gluten-Free Option: Use gluten-free graham cracker crumbs. This keeps the essence of the bars the same while accommodating dietary needs.
Enjoy your homemade Peanut Butter Chocolate Bars!